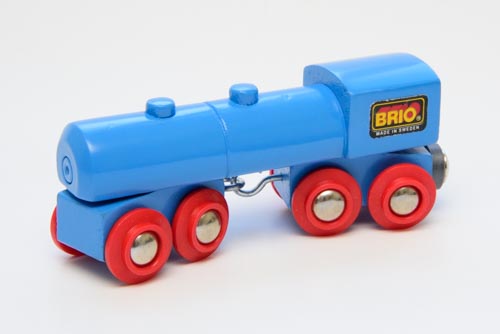
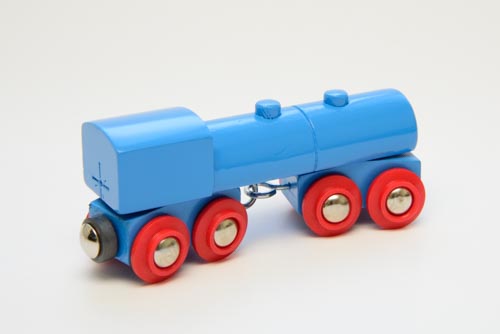
This is a record of the steps I followed to do a complete, major restoration of a #33429 Blue Steam Engine. This is one of BRIO’s rarest pieces, only showing up in one wooden railway catalog from the year 1993. It’s not clear why it had such a short production run but the best guess is that it was essentially parts re-use, a way to use up the engine bodies from the #33414 Steam Engine which had two pieces, the main body and a separate coal tender. Whatever the reason, though, this engine had a very short production run and from monitoring eBay off and on from 2000 through 2015 I have only seen three of them, and all three were in bad shape.
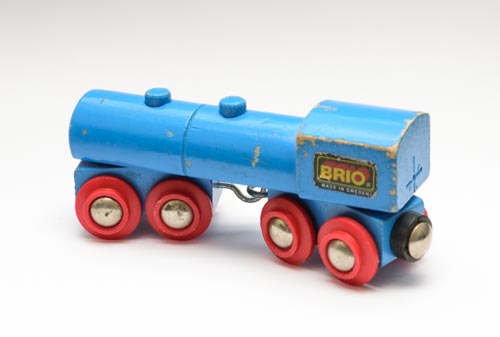
This is what my engine looked like when I purchased it as part of a lot:

Step 1. Assessment
The first step of the restoration was to assess the condition of the engine and work out what repairs would be needed. In this case, the damage appears to be mostly to the paint, sticker and wheels, but there were also a few dents in the wood as well as some wear along the edges. It was also not clear at first whether some of the larger paint chips were also gouges in the wood itself.
I decided right away that I was not going to try and repair actual wood damage unless it was severe. Any dents or dings would simply look like wear associated with normal play. That meant my restoration would be limited to the following:
- light sanding and repainting in the original color
- replacing the wheel assemblies
- replacing the sticker
- polishing the metal hooks that link the undercarriages
Replacing the wheel assemblies meant that I needed genuine BRIO replacement parts, from the #33393 Spare Parts kit. This kit is exceedingly rare, but some parts from the kit are sold individually on eBay.
Step 2. Disassembly
The second step was to disassemble the engine into its individual components. The undercarriages were fastened with Torx screws, the star-shaped screw heads designed to prevent cam-out that leads to stripped screws.
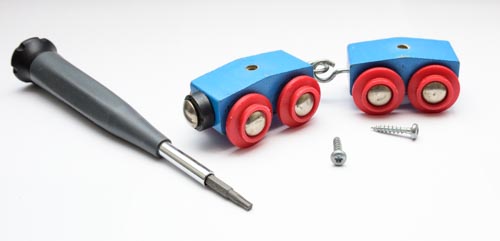
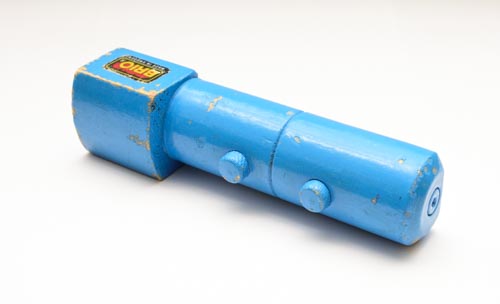
With the undercarriage removed, I also was able to get a look at the underside of the main engine body.
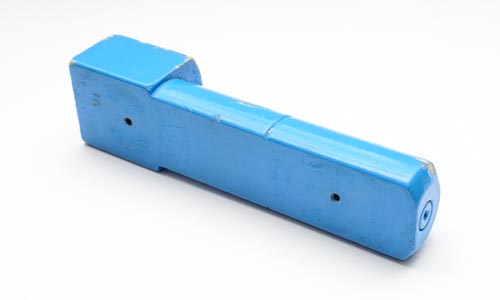
With the underside not really visible, and not showing significant wear, I determined that it would need very little work: only one or two mist coats of paint would be enough to give it a consistent gloss with the rest of the engine body.
Step 3. Sticker removal
My goal was to replace this sticker with an identical sticker from another, used part that was in my “spare parts” bin. I practiced my technique of safe sticker removal on the old engine, first, just to make sure it would work.
To remove a sticker, I placed a few drops of Goo Gone, a mild adhesive removal solvent, directly onto the sticker and let it sit. This solvent is not powerful enough to damage the lacquer paint, and the stickers themselves are a die-cut plastic.
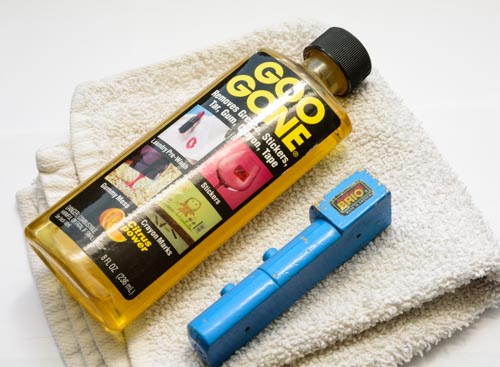
After letting the Goo Gone sit for a minute, I dabbed it up with a tissue. Note that it is important that to dab and not rub. Then, I slipped a straight razor blade, such as the type used in box cutters, under the corner of the sticker very carefully to separate it from the paint surface.
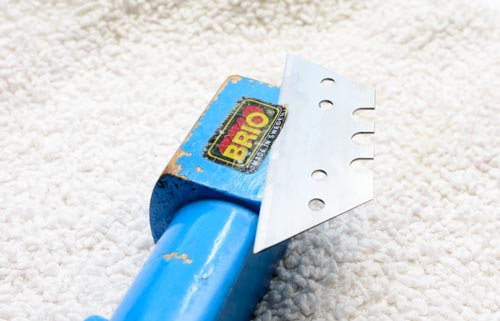
The Goo Gone had dissolved the adhesive along the edge of the sticker enough to lift away just the very edge of the sticker. Now I turned the engine on its back and put a few drops of Goo Gone into the gap between the sticker and the paint and let it sit for about 30 seconds.
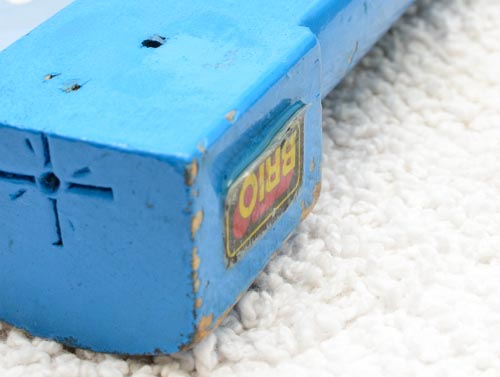
This let the Goo Gone work on more of the adhesive, with gravity holding it in place. After about 30 seconds, I slowly started peeling the sticker away, letting the Goo Gone work its way down the sticker as I went.
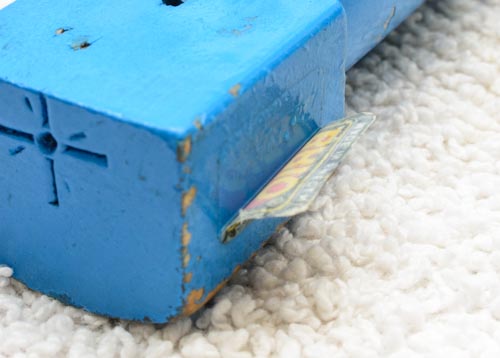
Eventually, all the adhesive was dissolved and the sticker came off completely. I then stashed the sticker on a acetate sheet for safe keeping. The rest of the Goo Gone was dabbed up with a towel.
Step 4. Sanding
With the sticker removed all that was left was to sand down the main body and prep it for painting. Because several of the paint chips went all the way down to the wood, such as the one shown below, I had to decide whether to sand the entire engine body down to the wood, or just sand the paint down around the chipped areas and feather it smoothly with the rest of the body as best as I could.
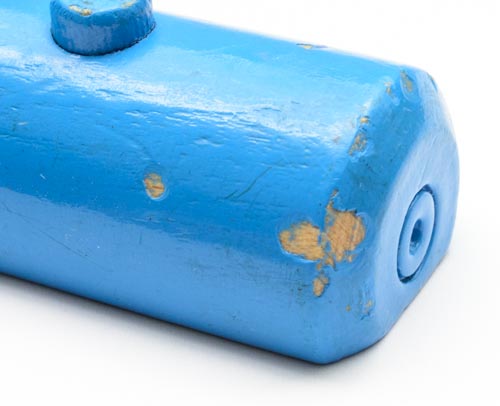
Because of the awkward shape of the engine body, I chose to do the latter: just sand the chipped areas down and feather them out. For sanding I choose sheets of 400 grit sandpaper and worked very slowly. Using such a fine grit lessened my chances of actually removing a large amount of the wood below the paint or rounding the sharp corners of the engine cab. The sanding process took by far the most time.

I also made sure that all of the old paint was at least lightly sanded in order to improve adhesion to the new paint layers.
Step 5. Painting the engine body
Before painting, I placed toothpicks in the screw holes on the underside. This not only prevented paint from getting in them, but it also provided a convenient stand for the engine during painting. I used a large Styrofoam block as the base, and stuck the toothpicks in it to prop up the engine.
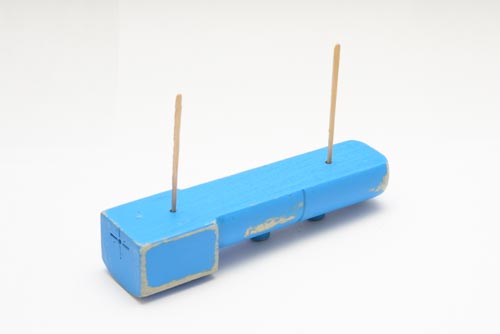
Painting was done using the Tamiya TS-10 French Blue spray lacquer, a synthetic lacquer spray that is an almost-perfect match for the original BRIO light blue.
Because of the amount of bare wood that would need to be painted, I started with just two very light coats of the Tamiya paint (one pass in each direction, on all sides) and let it dry for 30 minutes. I then repeated with two more very light coats, applied the same way, and let this dry over night. These first layers of paint served as my primer.
The following day I laid down the main color coats, using the same basic technique. It took about a dozen passes on each side to achieve the right color depth and to even out the appearance between regions that started as bare wood and sanded paint. I then let the color coat dry over night.
The next day, I used a wet sanding technique with 1500 grit sandpaper to smooth out the paint layer, removing any “orange peel” in the coat as well as some bits of dust that had lodged themselves into the paint while drying. To wet sand, I soaked the paper in water and added a tiny amount of liquid soap to serve as a lubricant. The entire surface of the engine was sanded lightly, then rinsed and toweled dry.
I then applied four more color coats to serve as the final paint layers and allowed the part to dry.

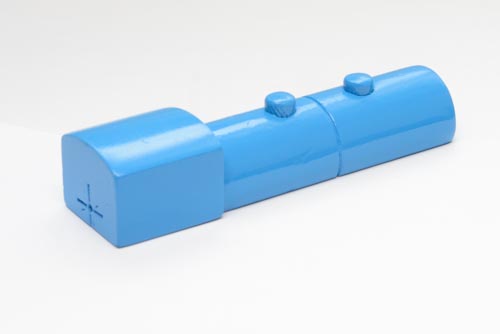
Step 6. Removing wheels and magnet
Because the Tamiya paint has such a high-gloss finish, it was clear that the undercarriages would have to receive a coat or two of the new paint so that the finishes would match. This meant that I had to remove not only the wheels as originally intended, but the magnet as well.
Removing the wheels is difficult because the single-axle wheel assembly is not meant to be removed, and doing so is a destructive process: once they are taken off, they cannot be reused. The best way to remove the wheels is to pop one of the hubs off of the axle.
To remove a hub, I first had to “pop” one out of the rimmed wheel. I placed my thumb on one wheel and index finger on the opposite wheel, and “pinched” the wheels together. This pressure was enough to force one of the hubs out of the wheel, at which point I could use a small, flat-head screwdriver as a pry-bar to lift the hub off the axle enough to grab it with a pair of pliers. After pulling the hub off, the wheel axle was easily removed.
Removing the magnet was also challenging because it is held in place with a nail that is ribbed along it’s shaft. I opted not to try and “save” the nail or magnet, and used pliers to pull them out. These would be replaced with fresh, replacement parts.
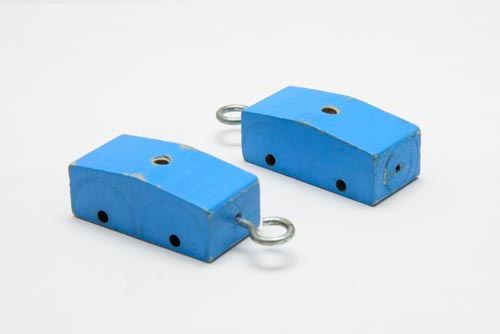
Step 7. Sanding the undercarriage
There was not any significant paint wear on the undercarriage, but there was some dirt buildup and the new paint layer would need a prepped surface to improve adhesion so some sanding was in order. I used the 400 grit sandpaper to very lightly sand all the surfaces.
Step 8. Polishing the hooks
I chose to polish the hooks with a metal polish before painting, as I didn’t want the abrasives to damage the new paint finish. This was done using a liquid metal polish.
Step 9. Painting the undercarriage
Painting the undercarriages was easy since I was just laying a thin color coat on top of the existing, sanded color coat. Just four passes on all sides was sufficient to give them the right glossy appearance. This was allowed to dry over night.
Step 10. Reassembly
With the paint dry enough for handling, I gathered the replacement parts together and reassembled the engine.

I put the replacement magnet on first since that required the most force. Then I put on the wheel assemblies one at a time. This was accomplished by placing the axle through the hole in the undercarriage, putting a wheel at each end and then squeezing the opposing hubs to snap them onto the shaft.
With the carriages assembled, all that was left was to attach them onto the engine body.
Step 11. Replacing the sticker
Since the Goo Gone dissolved the adhesive on the sticker during the removal process, the replacement sticker did not have sufficient adhesive to stick to the train body. To give it some fresh adhesive, I used a spray adhesive to spray a small amount onto a scrap piece of plastic, and a small brush to brush a very thin layer of fresh adhesive onto the back of the sticker. I then carefully applied the new sticker to the engine and let it set.
Step 12. Finis!
And here it is, the completely restored #33429 Blue Steam Engine!
