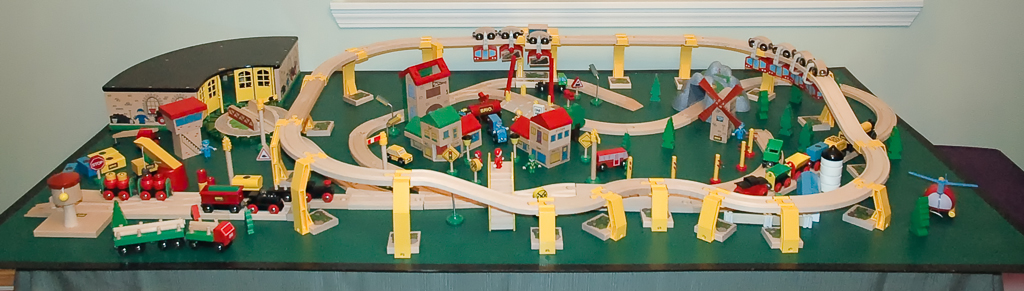
The typical children’s train table measures about four feet wide, just shy of three feet deep, and is only a foot and a half high. These are excellent dimensions for young children, of course, as they allow easy access for play and provide enough space for bridges and even double track, but this is the extent of their usefulness. For older children and adults wishing to create larger layouts, however, they are not practical building blocks.
Custom Tables for Semi-Permanent Layouts
If you want to build a semi-permanent, yet portable, layout and you have basic woodworking skills, then you should check out wTrak.org. There you will find designs for a modular system based on 48″x18″ decks. Though each deck design has a permanent track configuration, the modular system allows the individual decks to be reordered as desired, and includes designs for tees and corners to add variety. The designs include removable legs so that the resulting tables can be broken down and transported, and the decks themselves are sized to fit in most vehicles. This system is really geared for layouts that can be taken to and displayed at model train shows, but works equally well for in-home setups.
The down side is that the 18″ depth places a lot of track in a very confined space. The designs rely heavily on short curves—the E1 curves and O1 and P1 switches in the BRIO system—and these track types are not prevalent in BRIO sets. The switches in particular are hard to come by and this means you will most likely be purchasing a lot of third-party track. Furthermore, these tighter curves cause problems for, or outright derail, rolling stock with long wheel bases and fixed wheels, such as the #33654 Loads Wagon and the #33561 Boxcar. Last, you’ll be making miter cuts in some of your track and permanently gluing it down.
The track density also leaves little room for accessories and bridges, though since it’s geared towards serious hobbyists the intent is that such features would be custom-made.
Folding Tables
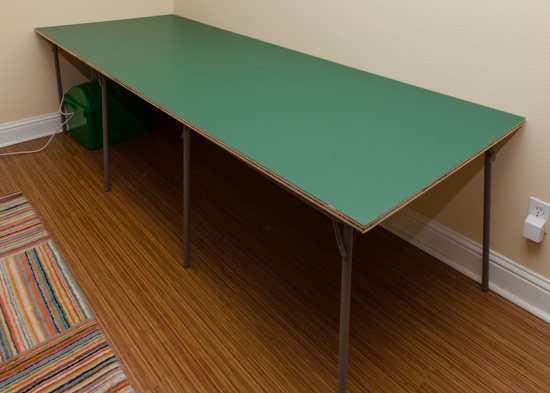
My personal preference for small, temporary displays is folding tables. Large tables range from six to eight feet wide and anywhere from two to three feet deep, while square card tables are typically about 36″ square. Multiple tables can be placed end to end to build larger surfaces for layouts. To eliminate gaps, posterboard can be laid on the table surfaces and arranged such that they span the edges where two tables meet. For about $2 per square foot one can also buy formica laminate—a material popular for kitchen countertop surfaces—in 4’x8′ and 5’x12′ sheets at any home supply store which you can cut to size. They can either be laid on the tables directly, or glued onto plywood sheets that are also cut to fit. One advantage of laminates is that they come in a variety of colors, and it is relatively easy to find an earthy green tone. For small layouts, I personally use two 36″ square card tables with a sheet of Wilsonart formica laminate in Hunter Green as a base.
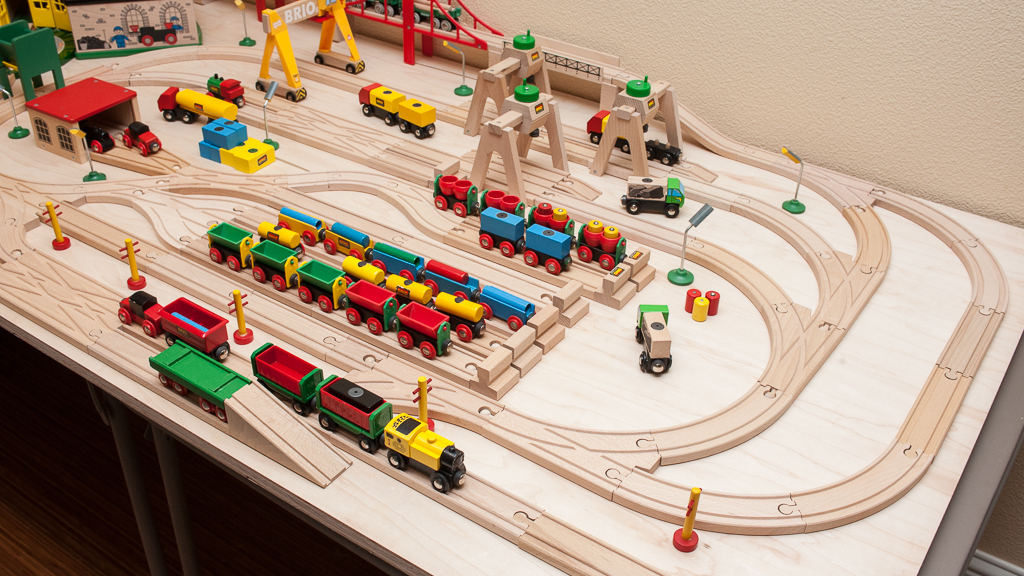
Many of the layout ideas on this site are based around the 36″ card table. I find the three foot depth to be a nice balance between layout flexibility and physical reach, while the six foot width is really the minimum for layouts that want to include larger pieces such as roundhouses, double track, and large bridges.
Alas, plywood in the U.S. comes in 4’x8′ sheets which means you’ll be making cuts and wasting some wood (and some laminate) if you want to keep your layouts to this base size. While it’s tempting to drop down to a 24″ depth to make more efficient use of a sheet, the large curves are too constrained by this narrow space. Going up to a 48″ depth also seems convenient, but it creates a problem with physical reach if you want to place the long edge against a wall. I find a 36″ depth to be the best balance between usable and reachable space.
Plywood Sheets
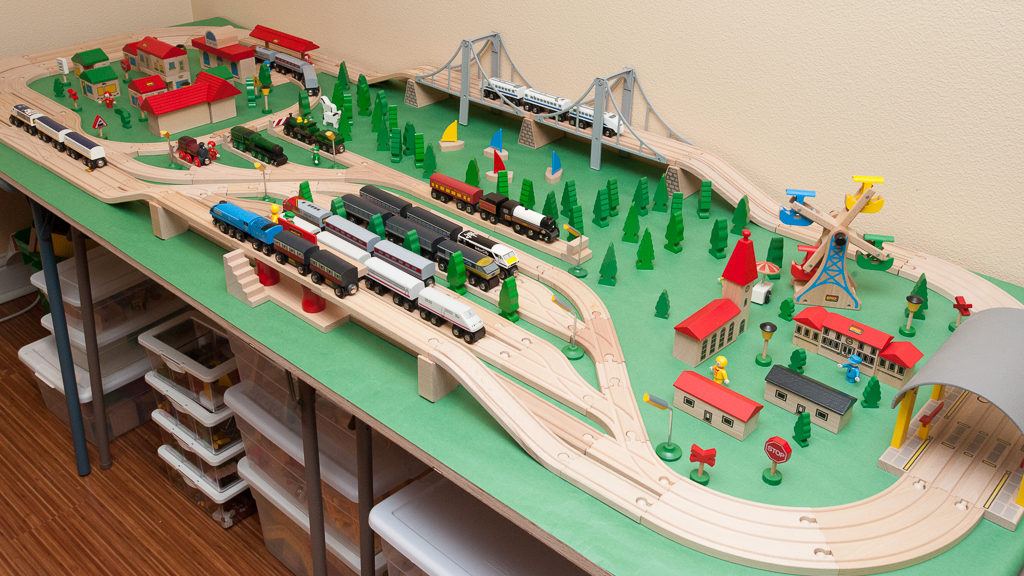
For larger layouts, I recommend using 4’x8′ 3/4″ hardwood plywood sheets cut do a 3′ depth, and using the full 8′ width. Again, the 4′ depth seems convenient as that would eliminate the need for a cut, but this is well beyond a person’s normal reach and many lumber supply stores will do one cut for free.
While fiber boards like MDF, HDF, particle board, and the like are tempting options because of their cost, I would avoid them for large train tables unless you plan on supporting the entire underside with an extremely stiff surface, or will be building a torsion box. These engineered wood products can be flatter and more easily worked with tools, but the short fibers cannot support their own weight over a long span so the sheets will bow in the center, just like cheap book shelving. It will cost more to get a true, hardwood plywood sheet that is nice and flat, but it will be significantly stronger than an engineered wood product.
Look for 3/4″ maple or birch prefinished plywood sheets. At this thickness you are most likely going to find it finished on both sides. The smooth, thin veneer means the plywood can be used as-is, stained or painted to a color of your choosing, or covered with laminate for greatest durability. Edges can be finished with glue-on edge banding.
Some of the layout ideas on this site are designed around the 3’x8′ plywood sheet, and use of playwood will in fact become necessary when dealing with more complicated table configurations like corners and tees.
Applying Laminate to Plywood
Laminate is my preferred surface for a train table top because it is tough and durable, and as a bonus it is extremely easy to apply to plywood. This is truly a DIY project that can be completed in just a couple of hours that does not require a great deal of expertise, expensive tools, or special equipment. I did my very first surface completely on my own with great success, despite never having used any of the equipment before, or owning any of the equipment beforehand, or ever having done any woodworking before, ever. The hardest part of this project was transporting the plywood. If someone like me with no experience can do it, then so can you.
There are plenty of sites on the internet with instructions for applying laminate to plywood, so rather than write up my own I’ll point you at the reference I used:
“Applying Plastic Laminate: Toughen up your work surfaces and jig facings with plastic laminate”
The Woodworker’s Journal, 2008
Here’s the equipment you will need (Amazon.com links provided for convenience, and are not necessarily product recommendations):
- contact cement
- paint roller and covers (inexpensive, for applying contact cement)
- 3/8″x36″ square dowel rods
- J-Roller
- laminate shears
- laminate trimmer or small handheld router
- flush trim bit with a bottom bearing
Laminate shears are important for rough-sizing the laminate before gluing it down. Too much overhang can cause the laminate to crack or chip as you are applying it because the laminate is very brittle where it’s not supported. You don’t want more than an inch overhang at the edges. Be careful when using the shears, however, as they don’t always cut perfectly straight. Draw a line on your laminate with a permanent marker and use that as a guide.
You can trim the laminate with a dedicated laminate trimmer or with a small router. A laminate trimmer is really just an even smaller, hand-held router, but it a less flexible tool for the money. A small router, like the Porter Cable 690LR or equivalent, won’t cost much more and will give you the abilities of a full router should you choose to do woodworking in the future. Or you can borrow or rent a router instead of buying, of course.
Make sure the shank diameter of your flush trim bit matches the collet size of your trimmer or router. Most laminate trimmers have a 1/4″ collet. Most routers come with both 1/4″ and 1/2″ collets, so you get your choice. Laminate is very easy to cut so you do not need a fancy trim bit: just two straight flutes and a bottom bearing are sufficient. There’s no need for shear-cut flutes or other expensive features. You also don’t need, or want, a long cutting depth since laminate is very thin and you aren’t going to be using the full thickness of the blade. This is a good argument for bits with a 1/4″ shank, since they tend to be shorter, though they will get hotter during use. Just work slowly, and back off when you feel resistance.
Table Tennis/Ping Pong Tables
A regulation table tennis table measures 9′ x 5′. This is rather large and will require access on all sides due to reach, but if your home already has one (or if you have the budget for it) then it is a great surface for a BRIO display as the table is nice and flat with plenty of surface area. You can cover it with green construction paper, poster board or card stock to give it a more earth-like appearance and protect the surface from scratches. If a regulation table won’t fit in your home, or is beyond your budget, midsize tables are roughly 6′ x 3′, about the size of two folding card tables.
Some table tennis tables even fold up flat vertically and are mounted on wheels which makes for easy storage. These are a great option where more permanent display spaces are not practical. Folding tables do tend to be more expensive, however, and table tennis tables are certainly not cheap to begin with. This level of convenience does come at a price.