When I say “track math” I am referring to the lengths of various BRIO track pieces and how they relate to one another. If you are planning a complex layout you know how much space you have to work with, and probably have a general idea of what kind of layout you want. From there, it’s a matter of determining which pieces of track you need, and how many of them, in order to build it. The discussion of track lengths, both parallel and on a diagonal, is intended to be a planning aid: you have to fit your track into this space, make two branches of track meet, and so on. If you know the distance you have to span, then it’s just a matter of finding the right combination of track that gets you as close to that distance as possible.
It’s important to note, however, that perfect alignment is not always going to be possible, and that’s OK because of the Vario System.
The Vario System
 BRIO track is intentionally designed with a little bit of “play”, meaning that you can wiggle the pieces around in the joints to make the track fit together at slight angles and even pull it slightly apart. This is necessary because the curved tracks create 45º angles, and basic geometry tells you that a 45º angle leads to distances that are multiples of the square root of two. It would therefor be extremely difficult to manufacture properly sized tracks that fit together perfectly in even a moderately complex layout. Through the use of this “wiggle room”, tracks can instead be pulled around enough to make a decent fit that would otherwise be impossible.
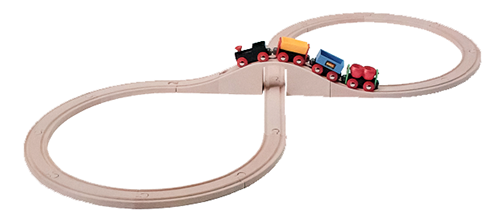
In fact, many of BRIO’s own pre-packaged starter sets depend on the Vario System. A classic example of this is what is probably the best known BRIO set: the Figure 8 with the viaduct, which has been sold as product 33125 for several decades. Note how the photograph from the BRIO 1996 catalog shows a perfect fit:
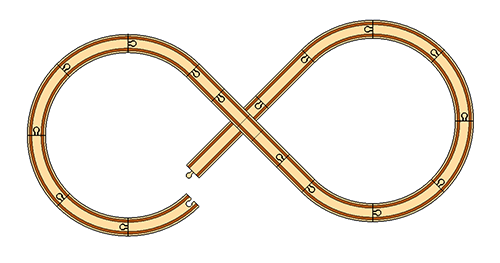
But when you actually lay this track out usinng a CAD system, you get a much different story. The track doesn’t meet, and it’s also not aligned with the center of the viaduct. The Vario System is what makes this layout possible.
So, when doing track math, use a grain of salt. For most layouts, getting “close” is good enough. Distances of a few millimeters are not significant in a straight run, and when curves are involved you get quite a bit more freedom. Just keep in mind that if you push the Vario System too hard, you can create sharp turns at joints that derail trains. While “close” is “close enough”, “very close” is always better.
Equalities and Equivalences
Per the track guide, BRIO striaght track has the following lengths:
| Track | Length (mm) |
|---|---|
| A2 | 54 |
| A1 | 108 |
| A | 144 |
| D | 216 |
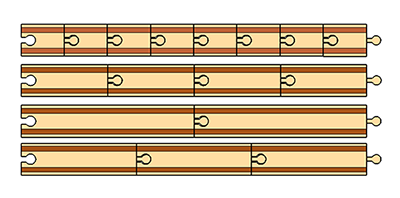
Here are the relationships between straight track pieces. An “x” indicates multiplication (e.g., 2 x A1 means two A1 pieces).
- A1 = 2 x A2
- D = 2 x A1
- 2 x D = 3 x A
In the graphic at the right we have, from top to bottom, 8 x A2, 4 x A1, 2 x D, and 3 x A track. All four of these configurations have a total length of 432mm.
Straight track also serves as the base straight/horizontal length for several switches:
- A is the base straight for F, F1, G, G1, I, J, L, M, L1, and M1
- A1 is the base straight for O1 and P1
- D is the base straight for T and X
BRIO’s Math Guide
Here’s a track chart from BRIO which shows the same information, along with some of the relationships between straights and curves. Note, however, that this chart is not perfectly accurate: track piece H1 is actually 116mm, even though the picture implies it is 108mm.
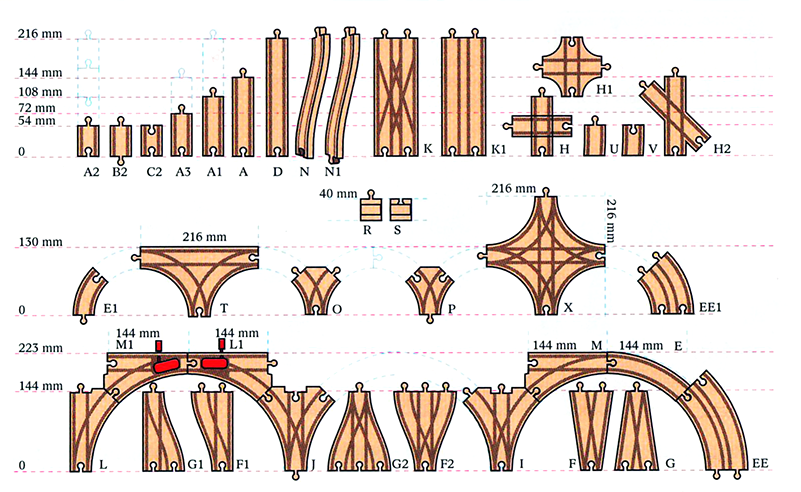
Bridge Spans
BRIO bridges come in four basic span lengths, which I’ll arbitrarily refer to as short, medium, long, and extra long. Note that I am referring specifically to the bridge decks, and not including the lengths of ascending track N and N1. BRIO catalogs list the length of the bridge plus the ascending track, which is how they get lengths of 648mm and up.
Note that this list of bridges is not comprehensive.
| Span | Length (mm) | Equivalent Track | Examples |
|---|---|---|---|
| Short | 144 | A | Tied Arch (bundled with starter sets, such as #33097 Cargo Railway Deluxe Set)
#33364 Draw Bridge |
| Medium | 216 | D | Arch (bundled with older starter sets only, applies to both the red plastic and vintage wood arches)
#33363 Up & Away Lift Up #33482 Girder #33375 Swing Bridge #33357 Lifting #33757 Lifting |
| Long | 324 | A1 + D | #33683 Double Suspension (this is a double-span bridge) |
| Extra Long | 360 | A + D | #33351 Viaduct
Suspension (bundled with starter sets, the Sydney Bridge, and the Double Suspension Bridge sets) #33397 Reversible Bridge (a double track, single-span bridge, can inverted to double the height) #33476 Double Track (a double track, single-span suspension bridge) #33372 Sydney Bridge (a double-span bridge) |
Special configurations
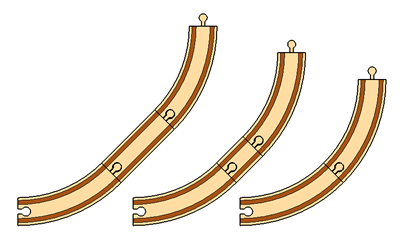
Sometimes you can obtain the track lengths you need by combining curves with straight track at an angle. This image shows how straight track can be used at an angle to stretch out the radius of a curve. These are E track with A1 and A2, respectively.
