March’19 Layout

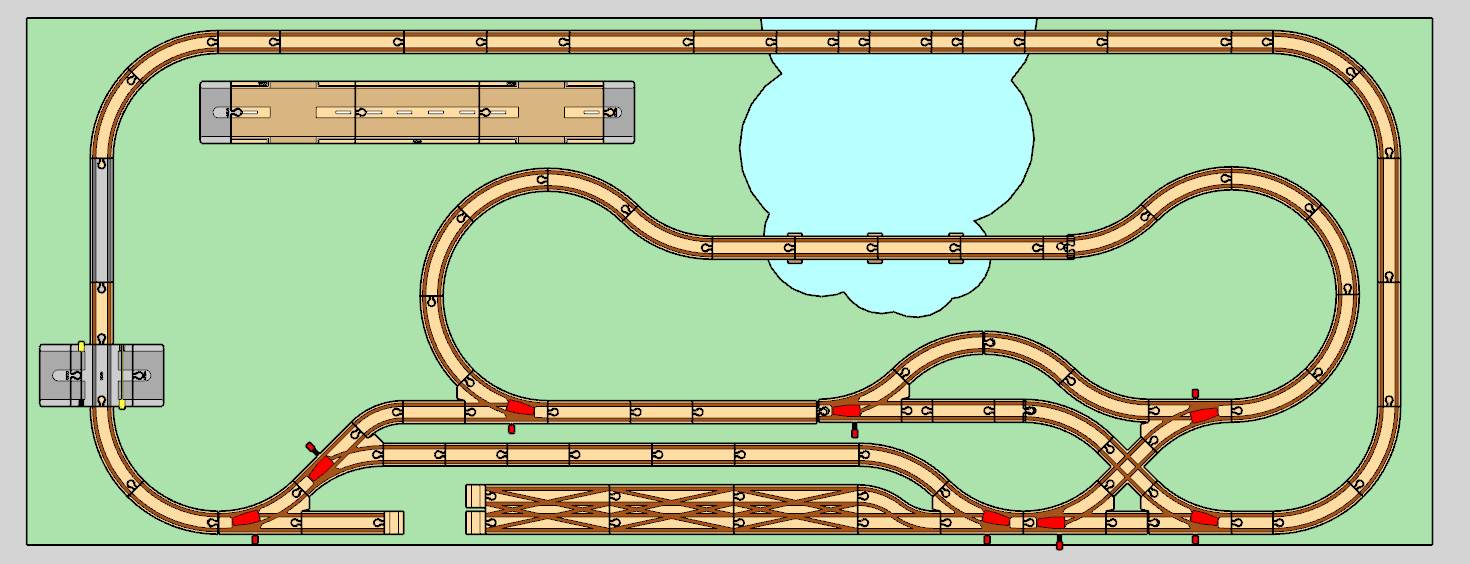
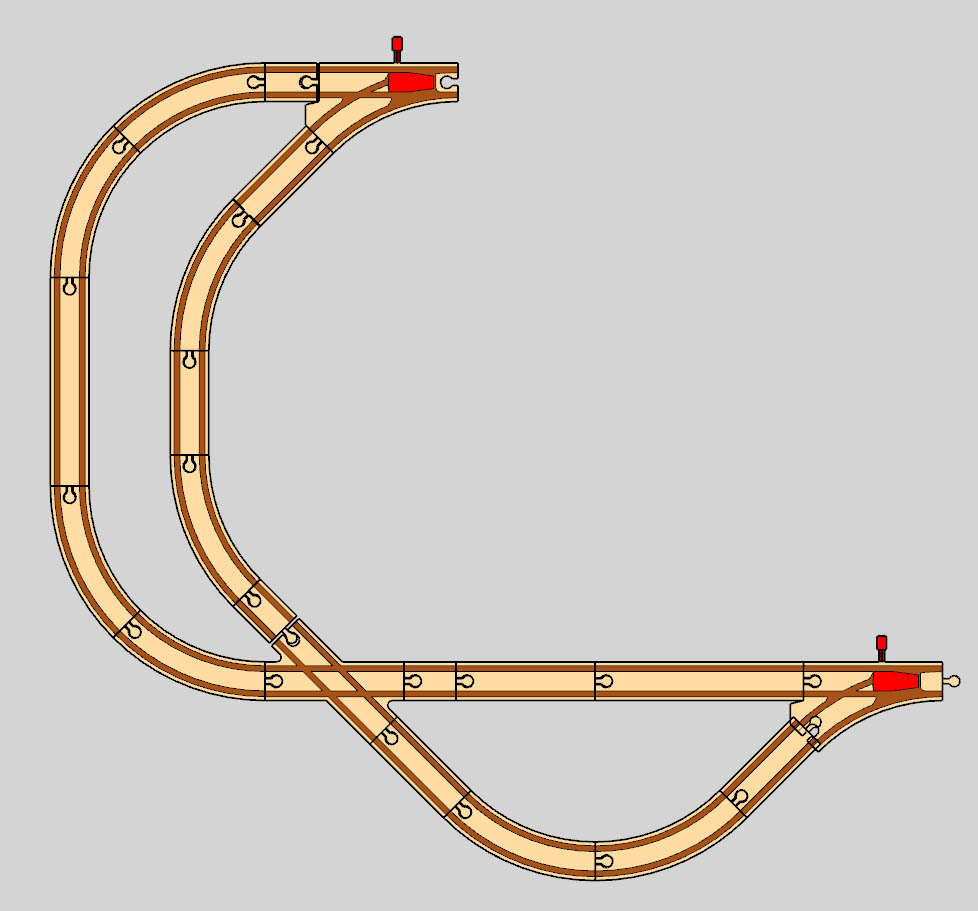
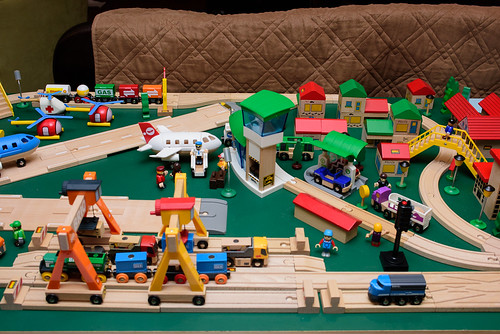
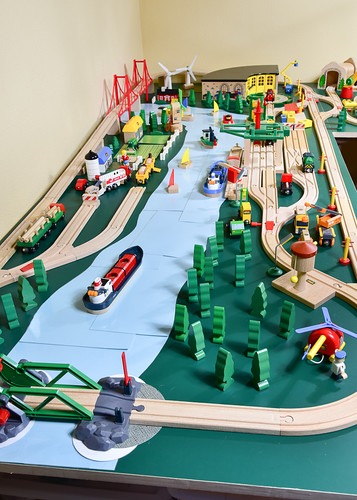
I pulled together some of my oldest pieces for this layout, which incorporates accessories from the 1960’s through the mid 1980’s. The Town set is the original version from around 1960, with double-sided printing on the buildings and a factory smokestack in red. The red lighthouses come from the second version of the Harbor Set which appeared in the mid 1970’s. Also present are two generations of the cars and trucks, the older set of which has wooden wheels (you can see the paint wear along their treads). The garage is harder to place as it was in production for well over a decade from the late 70’s through the 80’s. Similarly, the drawbridge could be from anytime between the early 60’s and the mid 70’s.

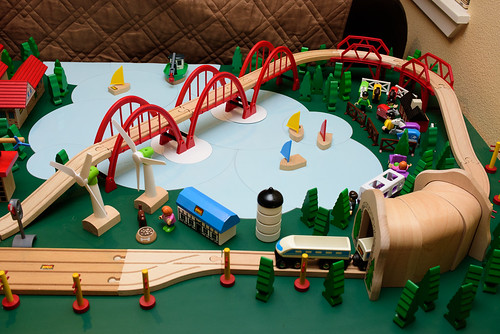
The boat is a bit of an unknown. It has similar styling to BRIO’s boats from the 1960’s and 70’s, but I’ve yet to find it in catalogs. Is it BRIO? It’s definitely beech wood, the paint finish matches BRIO parts, and it came in a lot with all genuine BRIO parts, but the possibility remains that it is from elsewhere.

The ferry shown is the 2nd generation from the late 80’s. I have the earlier model which has a solid red smokestack, but pulled out the wrong one by accident. I didn’t notice my error until after the photos were taken.

February’19 Layout

On this layout I added a simple backdrop to help isolate the toys from the background. This is a simple art paper that was sold in a 120″x10″ roll which I spray-glued onto cardboard cut into 3’x10″ panels (plus one panel trimmed to 2′ since my tables are 8′ wide). The effect is nice, though I really need something taller.

Here’s the rough track plan. This makes use of three A3 pieces, though only one was necessary.

Layout Option for the Criss-Cross Track, H2

I’ve struggled with solutions for the BRIO #33384 Criss-Cross Track, H2. The challenge is that it’s based on the A track length and the tracks cross at a 45 degree angle. This combination is mathematically problematic, as the angled track cannot make a perfect connection to the main line. Using this track means you’re heavily dependent on the vario system.

As you can see, the issue here is that BRIO opted for symmetry and preservation of the A track length rather than overall fit (a perfect join would require two tracks of unequal length—one 175mm and the other 160mm—and would need to be produced in pairs to allow for more than one orientation).

Making a branch off the mainline is relatively easy. The tightest configuration that produces a decent fit with large curves is 2xA, 3xA3, 2xE.

If you have the space, You can also use A1 along the diagonal and stretch out the main line to give the vario system more to work with.

While making these branches are easy, the real problem is rejoining the main line in a non-trivial configuration. You can, of course, just mirror this configuration end-to-end, but a cross track that rejoins the main line immediately is not particular useful and takes up a lot of space.

A space-efficient solution, and the one I like the best, uses the end of a loop.

All three track lines are perfectly lined up in this configuration. You can stretch out the main loop and the branch along the bottom to produce a non-trivial configuration with room for sidings and accessories. The longer it is, the less you’ll notice the imperfect fit.

The Criss-Cross Track is no longer sold. Most people probably won’t miss it because it’s a pain to use, but if you have one or are able to pick one up used, the above configuration can help you build a clean layout.

June’18 Layout

This layout does something I’ve always wanted to do: create a Figure 8 for the Sky Train. It took two complete Sky Train starter sets to pull off, and incorporates all of the Sky Train accessories.

The #33931 Clock Station and #33926 Loading Station are actually fairly restrictive in how they can be used. If you want to have a train passing under them using the lower track piece then they need to be placed along curves in the Sky Train loop, and it helps to have the yellow struts on the inside. The Sky Train Support bases are large and this is the easiest way to ensure the lower track clears them properly. BRIO illustrates this, more or less, in their 2004 Sky Train foldout.

In this layout, I also did something new: I used squares of textured scrapbook paper to represent land cover for the whole base. There are four shades of green, two shades of brown and two shades of grey. This time I chose not to laminate (unlike my previous experiments with papers) since the textured surface provides more friction for the track.

More Stacking Track Support layout options

Last time, I wrote about how to make multi-layered tracks with the #33253 Stacking Track Supports, but what if you want to make a crisscross arrangement to have the track pass through the support perpendicular to the elevated track? The supports are specifically made for this: the undersides are machined to provide the cross direction just a little more height in order to accommodate some of the taller engines.

So what are some layout options that give you a decent fit for a crisscross arrangement? I show two options below.

The first one uses a loop to double back behind the main line and cross under the support. It assumes you are using a descending N track, and you are passing under the “last” Stacking Track Support in the run. It uses an A2 on the diagonal of the loop to get the distances almost perfect (they are off by about 3mm, which the vario system can easily handle).

You can also make a branch that crosses under the track ahead of you instead of behind, like so:

These supports are expensive, but a great deal of fun if you have the space in your layout. The loop constructs shown above are a good way to make a visually interesting corner or tee in a multi-table setup.

Easy layout options for stacking track supports

The #33253 Stacking Track Supports and older style #33557 Bridge Supports are fun pieces because you can get multi-layer track configurations, assuming you are using low-height engines and rolling stock, of course. An easy configuration for getting track layered on top of one another is shown below.

The top configuration is for Stacking Track Supports, and the lower is for Bridge Supports. Here’s the former in 3-D to help visualize it.

The idea is, you use a switch to branch off the main line, place an ascending track on the main, and then curve the branch back underneath it. This keeps the two branches almost exactly even, enough that the vario system can fill the gaps. To merge the two lines back, you simply mirror the arrangement on the other end.


Layout: April ’18

My current BRIO layout makes use of a number of modern accessories that are quickly becoming favorites. My goal was to build a setup that incorporated an airport and a string of the red, arched bridges at a diagonal. I only had a single table to work with this time because of space constraints, so I opted for less track and a higher density of scenery.

You can view the whole album on flickr.

Building a river

My most recent layout featured a river running through the center of one of the tables, constructed from standard 12″x12″ scrapbook cardstock. Here’s how you can build your own.

Acquire your cardstock squares

In the U.S., the standard scrapbook cardstock size is a 12″ square, but the exact size doesn’t really matter so long as it’s large (at least 8 inches) and roughly square in shape. U.S. cardstock squares are actually a little longer in one direction to accommodate the barcode label and that excess length is trimmed away with a paper cutter.

The more squares you have the more flexibility you’ll have in your river shape so get more than you think you need. Each square is a foot long, but youll need some overlap to ensure a seemless river. A good rule of thumb is to have 25% more length in cardstock than you need on your table.

Make sure your cardstock has the same color or pattern on both sides. You’ll have more flexibility in forming your river if you can flip the pieces over.

Cut your squares in half

Divide each cardstock square roughly in half using a wavy cut. The center cut will become your shoreline. Experiment both with center-to-center cuts and with offset cuts so that you have pieces that can both widen and narrow your river.

Consider having your tiles hot laminated for durability.

Arrange your river tiles

The straight edges should be in the center of the river and the wavy cuts should be on the outside. Overlap the pieces as needed to sensure a smooth shoreline.

Here’s what the above example looks like in a layout:

Experiment with rotating some of the pieces, as well as having more overlap, in order to give you more options on shaping your river. As you can see in the layout photo below, I made use of angled tiles.

DSC_0086

December’14 Layout

This layout is one that I finished over the holidays, though I’d been tinkering with the design on and off for the past couple of months. I had three primary design goals:

  1. Design the layout specifically for battery engines. This meant using mechanical switches for the primary track switches and graded supports in place of traditional ramp tracks.
  2. Include a full amusement park, assembled from the new #33730 Roller Coaster Set and the vintage #33220 Amusement Park and #33221 Merry-go-round sets.
  3. Have a river running through the center of the layout, or at least a large part of the layout, instead of placing the water along an edge.


The river was formed from standard 12″x12″ scrapbooking cardstock. Each square was cut in half roughly down the middle with a wavy pattern, giving me two shorelines per sheet that were arranged in a winding path. To create the bend, I joined two paths at an angle and used circles to smooth out the joint.

The real challenge was the roller coaster because its large footprint threatened to eat up valuable space that I needed for track. I solved this problem by overlapping the two so that trains passed underneath the coaster.

The town is created from three generations of the Town set: the mid-60’s version with two wide skyscrapers, the 70’s version with one wide skyscraper and the first generation wooden trees, and the 80’s version with the taller and thinner skyscraper that most people are familiar with.

The track plan is shown below (click to enlarge).

Track Plan

Climbing hills with battery engines

BRIO’s battery engines, especially those that run on a single battery and have only two drive wheels, are not very good at climbing hills. A single engine on its own can probably manage to climb a ramp track (type N or N1), but attach a load to one of these engines and it will start to struggle. As the video below shows, attaching multiple cars to an engine all but guarantees that it will bind up on the ascent.

Notice that even the 4WD Rechargeable Engine struggles here and in fact does worse than the Freight Battery Engine. What happens is the flexible wheel base for this engine allows for two of the drive wheels to separate from the track on the ascent. Because the engine is much heavier than the standard battery engines the loss of two drive wheels stops it in its tracks. The Freight Battery Engine is actually a nice little performer, but with three loads it needs a boost to clear the hill.

So what do you do if you want to run these smaller battery engines in a layout that makes use of bridges or other multi-level track and accessories? The answer is to use the #33354 Graded Supports. As shown in this video, the gentler slope makes climbing hills a much easier task.

Unfortuantely, BRIO retired the graded supports back in 1998 so you must either find them used or opt for 3rd party equivalents such as the Jesse’s Toolbox Graduated Riser set. I like BRIO’s risers because they are all one-step risers, so you have significant flexibility in how you use them. You can also use the graded supports that were made for the Thomas Wooden Railway system, though be aware that you cannot mix Thomas and BRIO risers in the same stack as they have different widths. The Thomas risers were also retired several years ago, but this does provide you with more options on the used market.

Graded supports do require more space than a single ramp track, however. But, you don’t have to ascend in one-step increments and I’ve found that two-step increments along a piece of A track is a reasonable incline and that’s what I use in the video above. The standard BRIO riser is equal to six graded risers.

Note that I offset the riser at the top of the hill to place it under the peg connector rather than under the joint.

This prevents the peg from sticking up significantly above the track level and accidentally tripping the autostop switch on the engines.