A rail yard is a network of tracks for storing, sorting, loading, and unloading rolling stock and locomotives. One of the most distinguishing features of a rail yard is long stretches of parallel track used to store rolling stock off of the main line. Specially designed locomotives, called switching or shunting engines, are used to move cars around and attach and detach them from trains. These engines are optimized for the job of getting individual cars moving and stopped quickly.
A yard typically has several of the following components:
- Receiving yard, where incoming trains are disassembled. Sometimes called an arrival yard.
- Departure yard, where cars are assembled into trains.
- Switching yard, where rolling stock is organized and stored. In the U.S. and some parts of Canada, these are called a classification yard, and in the U.K. and some parts of Canada, they are called a marshalling yard. The term shunting yard is less common.
- Freight terminal, for loading and unloading rolling stock.
- Engine house or roundhouse, where locomotives are stored, fueled, and serviced.
- Maintenance yard, where rolling stock is serviced.
Yard components can also be described by their geometry. A stub yard is a yard layout with an egress on only one end, which a typical configuration for a switching yard. In contrast, a through yard connects on both ends. This is a common configuration for receiving and departure yards, but it is also used in switching yards as well.
What you’ll need
Because yards have so many elements even a simple configuration can take up a great deal of space. Indeed, one could very easily fill an entire table with just a classification yard, and consume a half a dozen L and M switches in the process. Add a roundhouse, turntable, engine shed, and other accessories, and one could conceivable build an entire two or three table layout that was nothing more than a yard! So obviously some simplification and compaction is necessary, particularly if you are limited in space, track, or both.
That being said, even a simple yard is going to take a lot of track, and in particular a lot of switches. This is the one place where I recommend you have specialty pieces, and possibly some third party track to help you along. Here’s what should be in your toy box:
- L and M switches, and lots of them. You can easily use a half dozen switches in a yard, and what can be particularly frustrating is that you won’t use them in equal amounts. You might need six of one, and one or two of the other.
- O1 and P1 switches. I am not a huge fan of the tighter E1 curves for several reasons, but making a classification yard, or even a siding for a departure and receiving yard, is going to take a lot of space if you are using L and M. If you don’t have a lot of room, these are your only option. It is unfortunate that the genuine BRIO switches can be hard to come by outside of #33307, the Advanced Expansion Pack.
- The T Switch, which will allow your locomotive to turn around.
- A turntable, for the same reason. Note that the Mechanical Turntable, #33361, is too small for the large and medium-sized engines, so you should consider one of the larger, retired turntables such as #33460 the Round Turntable, or #33276 the Grand Turntable.
- At least one pair of F1 and G1 parallel switches. These are the most compact means of building a siding.
- U and V ramp tracks
- R and S buffer stops
- At least one pair of I and J double curve switches. These are space-savers, allowing you to use one switch in place of two L or M laid end-to-end.
- Some sort of A3 track equivalent. If you can find genuine A3 track, then great! Otherwise, consider the 3″ straights from either Maxim or Jesse’s Toy Box as a substitute. You’ll need them for through yard configurations.
- A round house, engine shed, or both.
Stub Yards
Some common constructions for a stub yard using BRIO track are below.
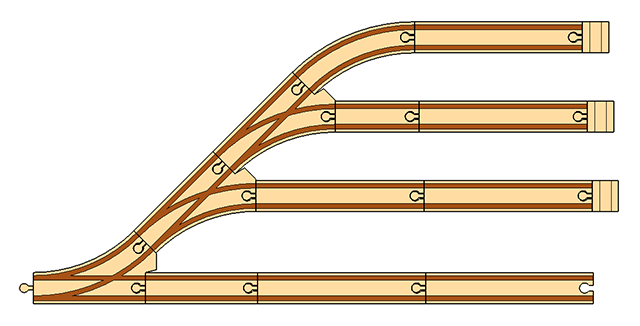
This is the most basic configuration, using three curved switches (in this case, 3 x M) to form three spurs. Keeping all of the branches to an identical length is not really possible, something that will become a problem later on when we discuss through yards.

An alternative arrangement is to split the middle branch into two branches. This does not change the total area needed by the yard, but it does alter length and spacing of the first two sidings. This approach of making a branch off of the main artery of the yard and splitting it again is fairly common in real switching yards.
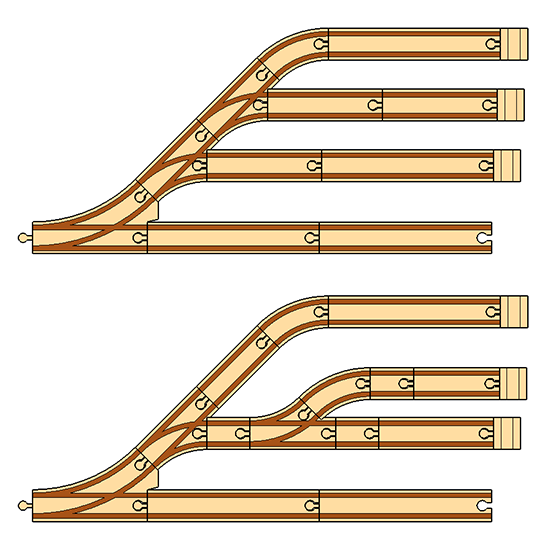
If space is absolutely at a premium, then you can use the short cuved switches O1 and P1, and the short curve E1 to make the yard more compact.
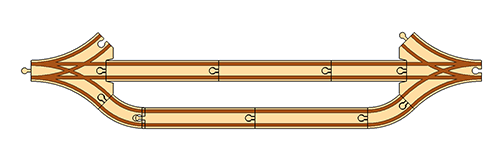
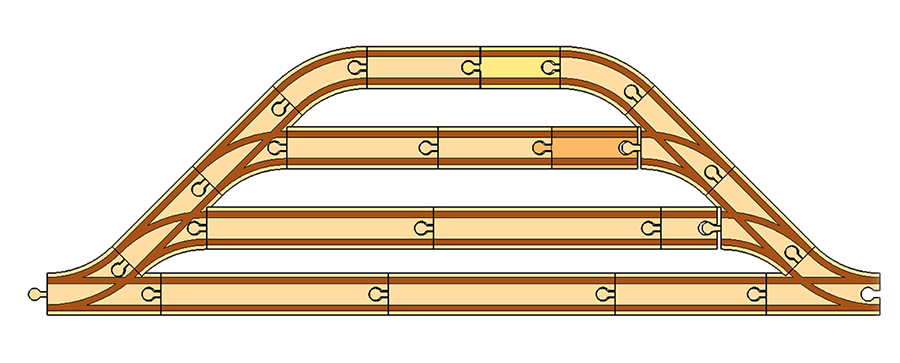
Through yards
The geometry of through yards can be problematic because you have to make multiple sidings split and then rejoin. While the Vario System can generally soak up small differences in track lengths, when you make multiple joints you end up forming a far more rigid structure. Imprecise alignments that can be ignored in typical BRIO layout quickly become huge problems in a through yard, as you can no longer force the track to fit.
The layouts presented so far have all used genuine BRIO track, but when it comes to through yards the use of third party track simply cannot be avoided. Even if you are fortunate enough to possess some of the rare A3 pieces, the slightly longer Jesse’s Toy Box 3″ straight, and longer still Maxim 3″ straight, are necessary components.
Another problem with through yards is simply the space required. If you want more than one or two sidings, you are going to need a lot of room.
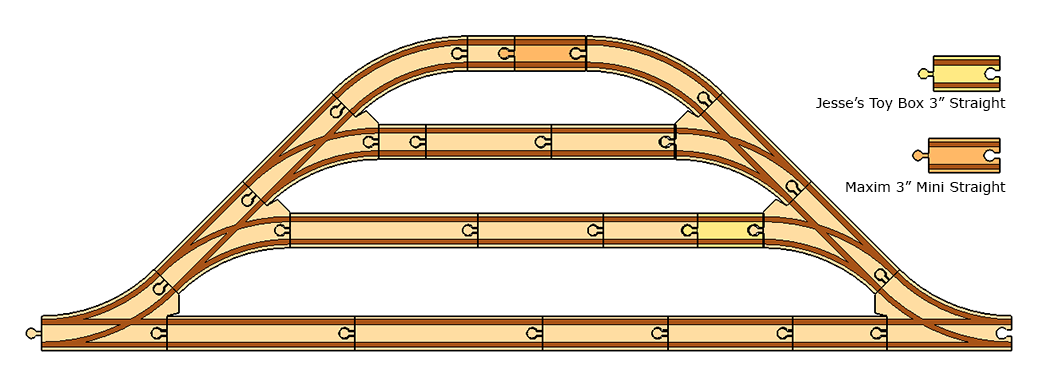
Changing from L and M switches to O1 and P1 switches does compact the layout.
BRIO created a simpler, smaller version of a through yard in its vintage sets, such as this configuration from the 1987 starter set #33143. It uses Ex2 + Dx2 in the siding, and A + Dx2 in the main line.